As a video producer with over 5 years of experience using Adobe Premiere Pro, I can confidently say that keyboard shortcuts are an amazing way to dramatically speeding up your workflow.
It wasn’t until I attended an Adobe MAX creativity conference that I realized the power of keyboard shortcuts. The presenter demonstrated how to edit an entire sequence without touching the mouse, and I was amazed at the efficiency.
Since then, I’ve made it my mission to master Premiere Pro shortcuts, and the results have been transformative. What used to take me hours now takes minutes, allowing me to focus more on the creative aspects of video production rather than getting bogged down in technical processes.
Premiere Pro Free Trial
You can download Premiere Pro here which comes with a free trial.
The Power of Shortcuts
Shortcuts can save you a whole heap of time when editing videos within Premiere Pro. In this article I will go through a list of shortcuts to use on both Mac and Windows computers.
Then we will get into some other methods of how you can speed up your workflow within Premiere Pro.
20 Essential Adobe Premiere Pro Shortcuts
Here are 20 essential shortcuts for Adobe Premiere Pro on Mac and Windows:
Mac Shortcuts Premiere Pro
1. Command + K: Add edit (cut) at playhead
2. Command + C: Copy
3. Command + V: Paste
4. Command + Z: Undo
5. Command + Shift + Z: Redo
6. I: Set In point
7. O: Set Out point
8. Spacebar: Play/Pause
9. J: Rewind
10. K: Stop
11. L: Fast forward
12. Command + R: Speed/Duration
13. Command + T: New title
14. Option + [: Trim start to playhead
15. Option + ]: Trim end to playhead
16. Command + `: Toggle full screen
17. Shift + 1: Audio workspace
18. Shift + 2: Assembly workspace
19. Command + M: Export media
20. Command + S: Save project
Windows Shortcuts Premiere Pro
1. Ctrl + K: Add edit (cut) at playhead
2. Ctrl + C: Copy
3. Ctrl + V: Paste
4. Ctrl + Z: Undo
5. Ctrl + Shift + Z: Redo
6. I: Set In point
7. O: Set Out point
8. Spacebar: Play/Pause
9. J: Rewind
10. K: Stop
11. L: Fast forward
12. Ctrl + R: Speed/Duration
13. Ctrl + T: New title
14. Alt + [: Trim start to playhead
15. Alt + ]: Trim end to playhead
16. Ctrl + `: Toggle full screen
17. Shift + 1: Audio workspace
18. Shift + 2: Assembly workspace
19. Ctrl + M: Export media
20. Ctrl + S: Save project
These Premiere Pro shortcuts cover a range of essential functions, from basic editing operations to playback controls and workspace management. Mastering these shortcuts can significantly speed up your editing workflow.
Remember that while many shortcuts are similar between Mac and Windows, the main difference is typically using Command (⌘) on Mac versus Ctrl on Windows.
Customizing Your Shortcuts
One of the most useful features of Premiere Pro is the ability to create custom keyboard shortcuts. To access this, go to the Edit menu at the top of the screen, then select Keyboard Shortcuts. Here, you can modify existing shortcuts or create new ones for menu commands that don’t have keyboard shortcut equivalents.
I’ve found that customizing shortcuts for specific panels and frequently used tools has been a game-changer. For example, I’ve set up shortcuts for my most-used effects and transitions, allowing me to apply them instantly without digging through the Effects panel.
Advanced Shortcut Techniques
One particularly useful shortcut combination involves the Alt key (Option on Mac) as a modifier. For instance, Alt+dragging a clip will instantly create a duplicate, saving you the trouble of copy-pasting. Similarly, Alt+clicking on the work area bar allows you to quickly adjust its duration.
While using these shortcuts is slow and possibly frustrating at first, the payoff is worth it when it becomes second nature. I estimate that using shortcuts has cut my editing time by at least 30%, allowing me to take on more projects and spend more time refining my work.
Tips for Newcomers
For those new to Premiere Pro or coming from Premiere Elements, don’t be intimidated. Start with the basics like J, K, L for playback, and gradually incorporate more as you become comfortable. Adobe provides a PDF of all available shortcuts, which you can keep handy as a reference.
One word of caution: be careful when using shortcuts for delete operations or when working with nested sequences. It’s easy to accidentally ripple delete a section of your timeline if you’re not paying attention. Premiere will usually give you an alert if you’re about to make a significant change, but it’s always good to be mindful.
Other Ways to Speed Up Workflow in Premiere Pro
Making videos in Premiere Pro can be very time consuming. Sometimes you can get lost in the software on some minor detail that barely even matters. Lets get into some other ways you can save time and speed up your workflow.
1. Using Text Templates
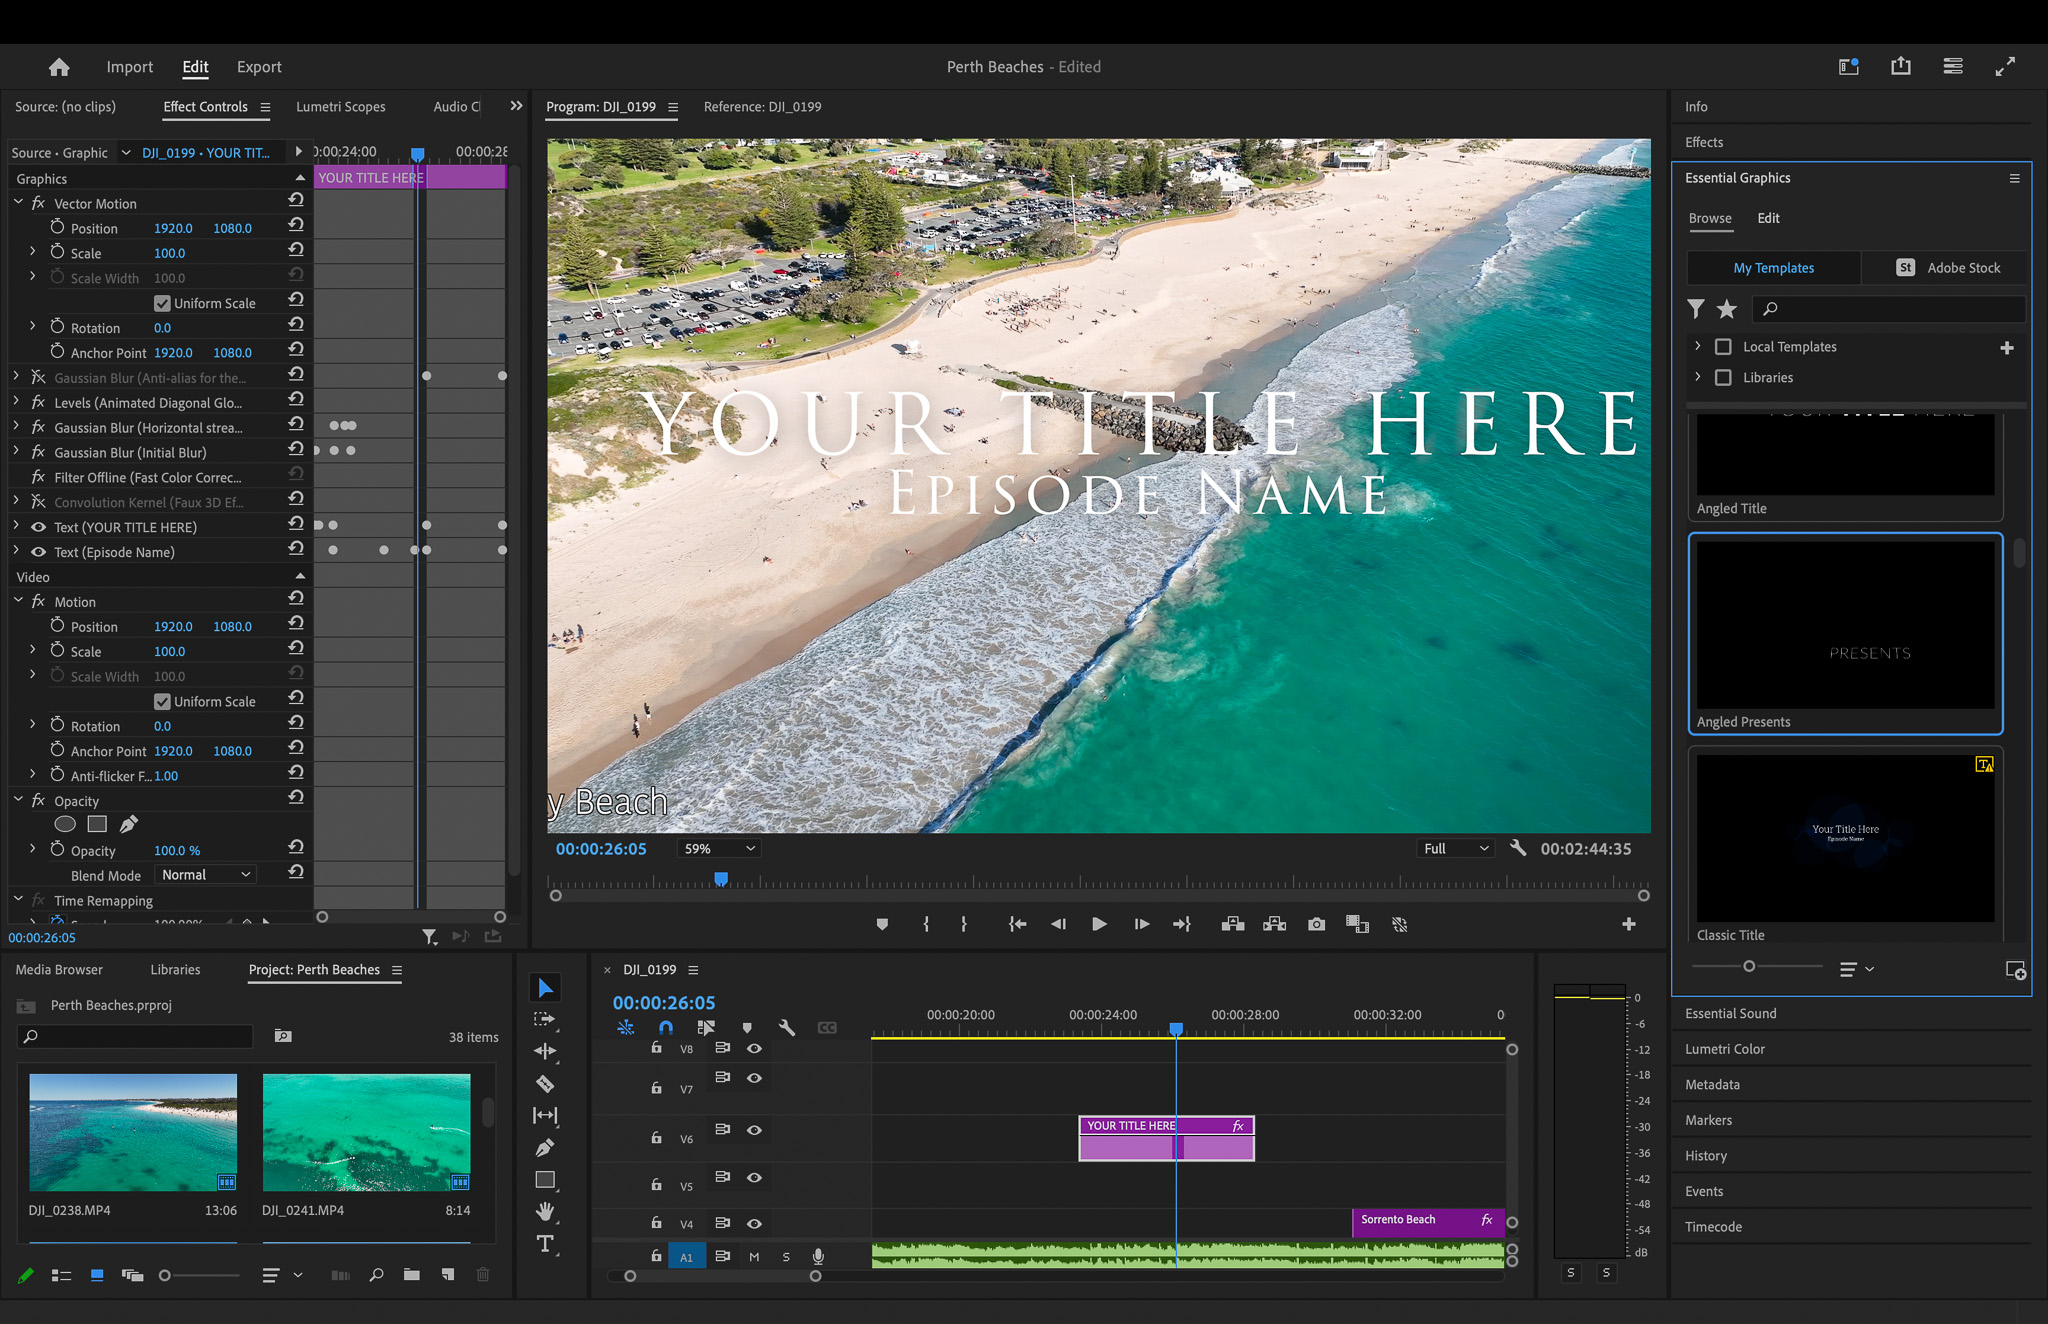
Adding Text in Premiere Pro is a great way to increase engagment, text templates are powerful tools for consistent branding and quick text creation. The Essential Graphics panel offers a variety of pre-made templates that you can customize.
For instance, you might create a template for your YouTube channel’s intro, with placeholders for episode numbers and titles. Once saved as a Motion Graphics Template (.mogrt), you can drag and drop this into any project, quickly fill in the text, and maintain a consistent look across all videos.
2. Adding Presets
Presets save you from recreating complex effect combinations. For example, you might create a “cinematic look” preset that combines a specific Lumetri Color grade with a subtle film grain and vignette.
Once saved, you can apply this entire look to any clip with a single click. For colour grading, you could create presets for different moods or times of day (e.g., “Warm Sunset,” “Cool Night”), allowing for quick, consistent grading across scenes.
3. Leveraging Adjustment Layers
Adjustment layers act like invisible veils over your footage, applying effects to everything below them. They’re particularly useful for scene-wide color corrections or stylistic effects.
For instance, you could add a subtle film look to an entire scene by applying film grain and color grading effects to an adjustment layer, rather than individually to each clip. This also allows for easy tweaking of the overall look without affecting individual clip adjustments.
4. Proxy Workflow
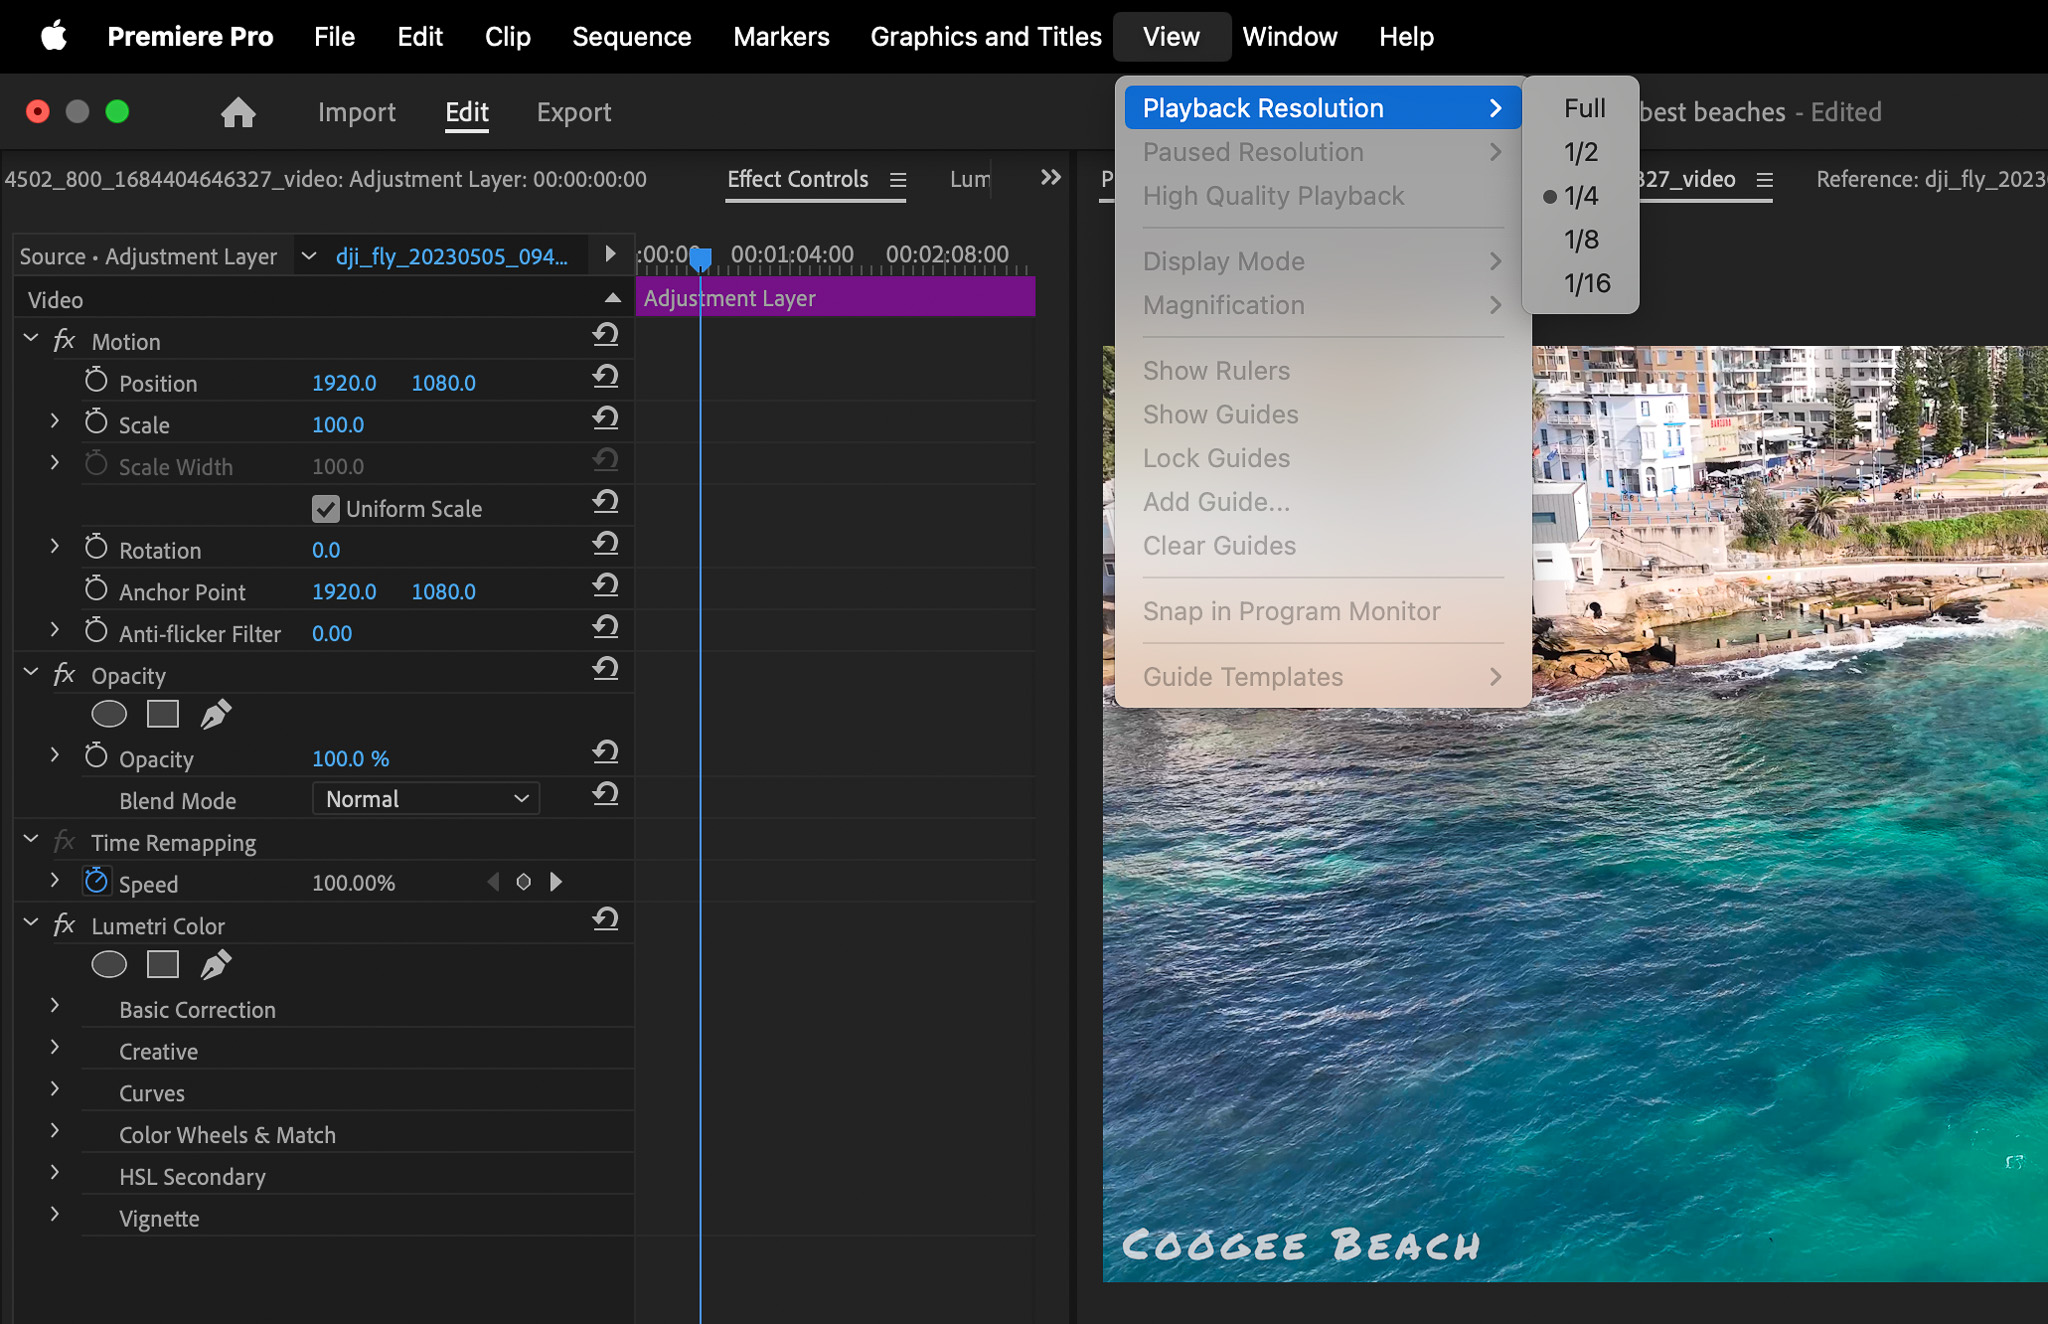
When working with high-resolution footage like 4K or 8K, proxies can speed up your editing process. Create lower-resolution (e.g., 720p) proxy files of your footage.
Premiere Pro can automatically switch between these for editing and the full-resolution files for export. This allows for smooth playback and quicker rendering during the edit if your computer power can’t keep up, while still maintaining the full quality for the final output.
Head to the view panel at the top and then playback resolution then choose 1/2, 1/4 whilst you edit.
5. Utilizing Sequence Presets
Custom sequence presets save time in project setup. If you frequently work on projects with specific requirements (e.g., 1080p at 24fps for film-style projects, or 4K at 60fps for sports highlights), create presets for these.
When starting a new project, you can instantly set up your timeline with the correct settings, saving time and reducing errors.
6. Master Clips
Applying effects to master clips in the Project panel is a powerful way to ensure consistency. For instance, if you have interview footage that needs a specific colour correction, applying it to the master clip means every instance of that clip in your sequences will have that correction.
This is particularly useful for documentary-style projects where the same clips might be used multiple times.
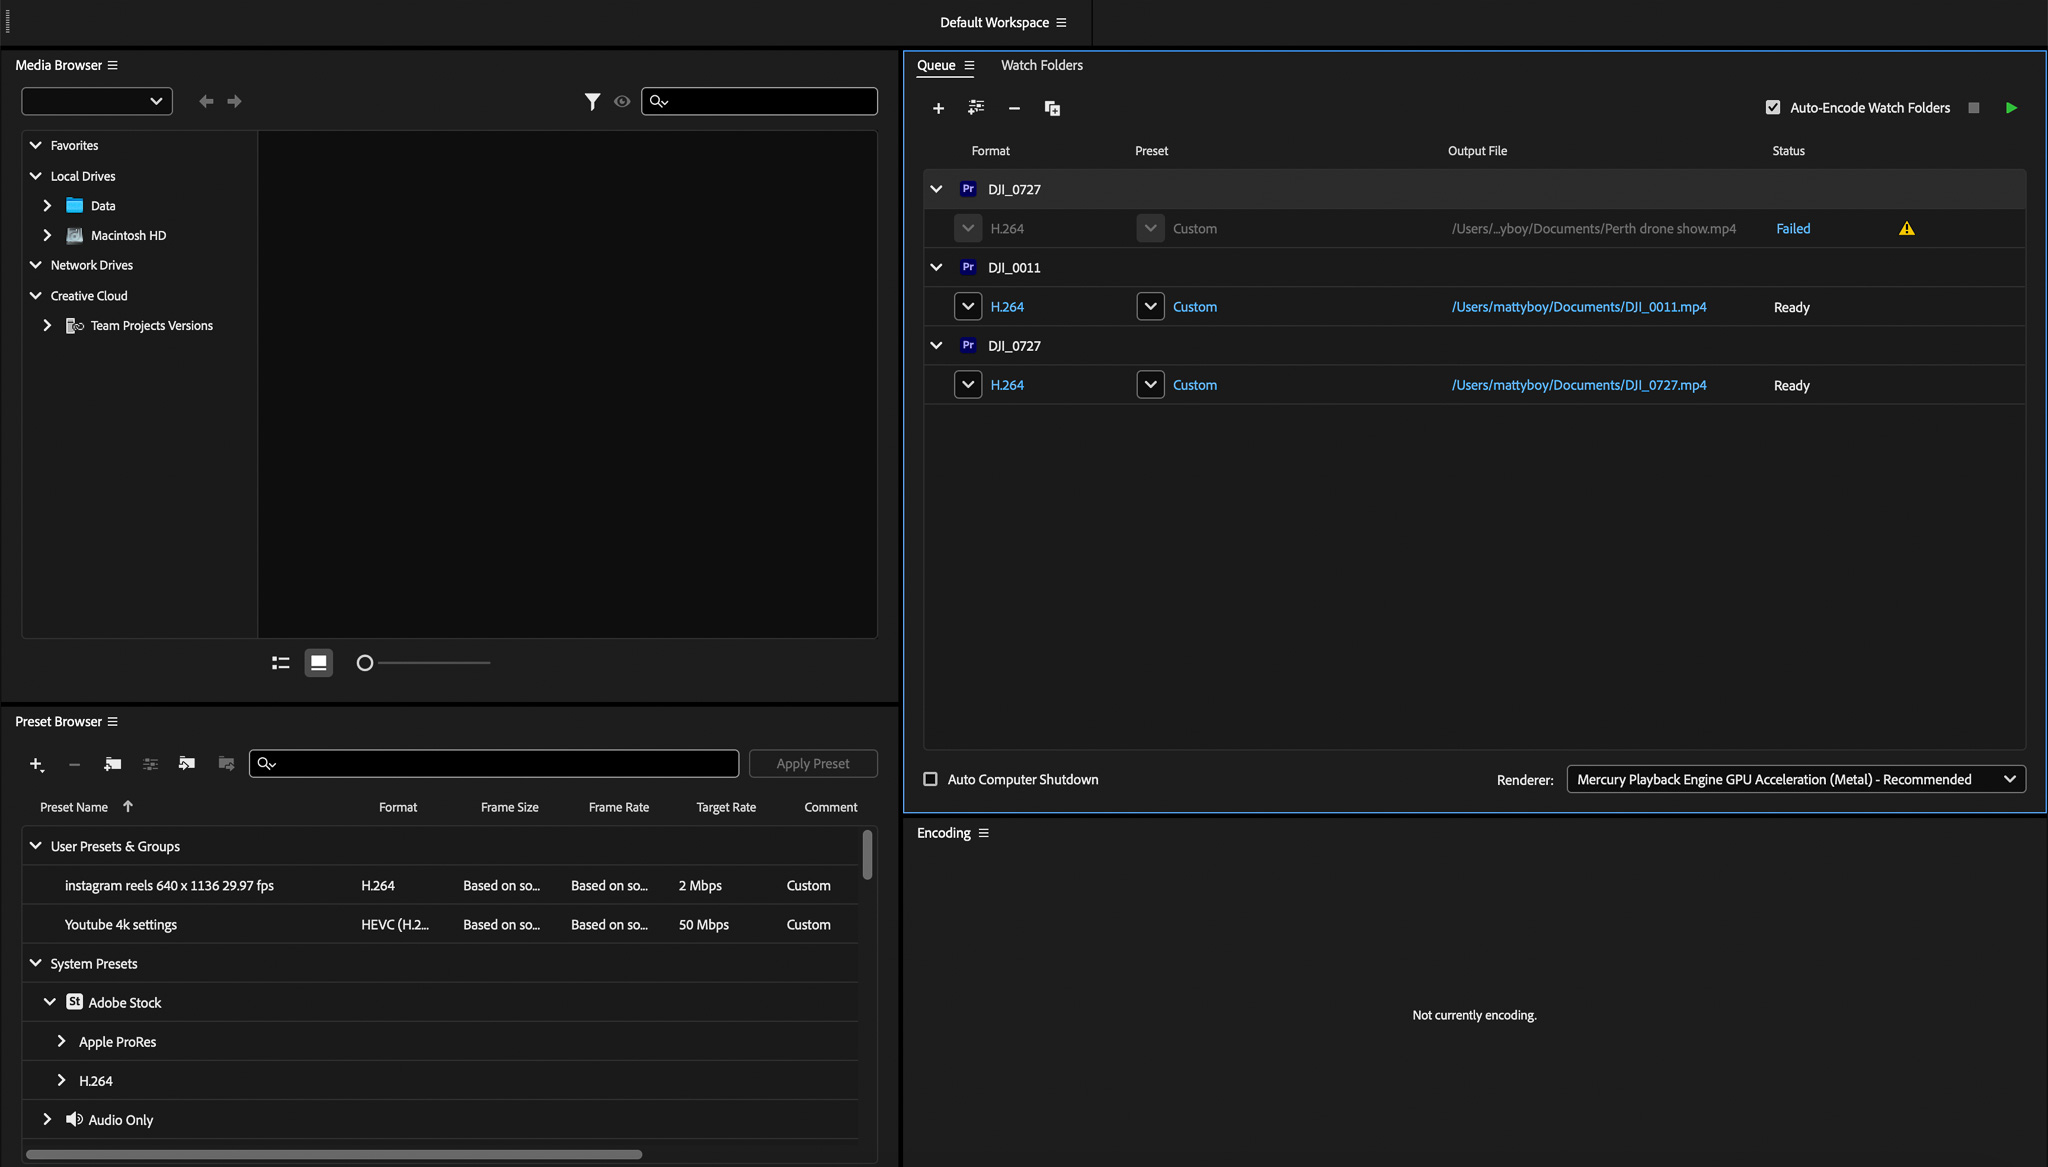
7. Batch Processing with Media Encoder
Use Adobe Media Encoder for exporting multiple sequences or even multiple projects at once. This is especially useful for delivering multiple versions of a project or when you need to output in various formats for different platforms.
Looking for the right export settings for YouTube videos?
8. Using Multi-Camera Editing
For projects shot with multiple cameras, like events or interviews, the multi-camera editing feature is a huge time-saver. It allows you to sync all your camera angles and switch between them in real-time, almost like live-switching. You can then fine-tune your edits after the initial cut.
9. Employing Dynamic Link
Dynamic Link with After Effects eliminates the need for rendering and importing motion graphics. For instance, you can create a complex animated lower third in After Effects, and then use it directly in Premiere Pro.
If you need to make changes, simply update it in After Effects, and it automatically updates in Premiere Pro.
As you can see, there is so much you can do within Premiere Pro to speed up your workflow and get this automated. The more you use these techniques, the quicker you will become.
10. Adding a Speed Ramp
Although adding a speed ramp doesn’t speed up your workflow, it does speed up your video to add a cool effect. Checkout my recent on article on how to add a speed ramp.
Wrap Up
Mastering Adobe Premiere Pro shortcuts is an investment that will pay dividends in your video production workflow.
From simple actions like using the backslash key to fit your sequence to the program monitor, to complex operations involving multiple modifier keys, these shortcuts will help you work faster and more efficiently.
So take the time to learn them, and customize them to your needs. Your future self will thank you when you’re flying through edits with the precision and speed of a seasoned pro.

Frequently Asked Questions
What Are the Top 5 Shortcuts for Beginners?
For beginners using Premiere Pro, here are five useful shortcuts to know: Ctrl+S (Save), Ctrl+Z (Undo), Ctrl+C (Copy), Ctrl+V (Paste), and the Spacebar (Play/Pause). For Mac users replace the Ctrl with Command.
Using these shortcuts will help make your first editing experience smoother.
How Do I Assign a Custom Shortcut in Premiere Pro?
To set a custom shortcut, go to Edit and then Keyboard Shortcuts. In the keyboard customization dialog box, look for the command you want to change. Click in the shortcut field and press the key combination you want to use.
What’s the Best Way to Practice and Memorize Shortcuts?
The best way to get better at remembering Premiere Pro shortcuts is to use them often. Try to add a few new shortcuts every time you edit. You can also use cheat sheets as a quick guide.
How do I Fix Shaky Video?
To fix shaky video in Premiere Pro, you should use the Warp Stabilizer effect. This great tool looks at your footage and helps make shaky movements smooth. This will give your video clips a more stable and professional look.
