After six years of being a drone photographer and fine tuning countless aerial images, I’ve learnt that capturing the is only half the battle. The real magic happens in editing and bringing your drone shots to life.
Adobe Lightroom has been my go to tool for transforming raw drone footage into polished, professional-grade photographs. Whether you’re dealing with harsh middat sun, tricky exposures, or the unique challenges of aerial composition.
This beginners guide will walk you through the essential tips on how to edit drone photos in Lightroom. Techniques that can elevate your drone photography from good to exceptional. As well as a few handy drone flying tips.
Understanding the Basics of Drone Photography
Before we jump into how to edit, it’s important to get the basics of drone photography down. With a drone, you can take amazing photos from above that just weren’t possible before. Here are some essential drone flying tips.
The Importance of Shooting in RAW Format
One thing that really makes drone photography stand out is its ability to take pictures in RAW (DNG) format. When you shoot in RAW, you get all the possible image details, including important metadata such as shooting details and image attributes.
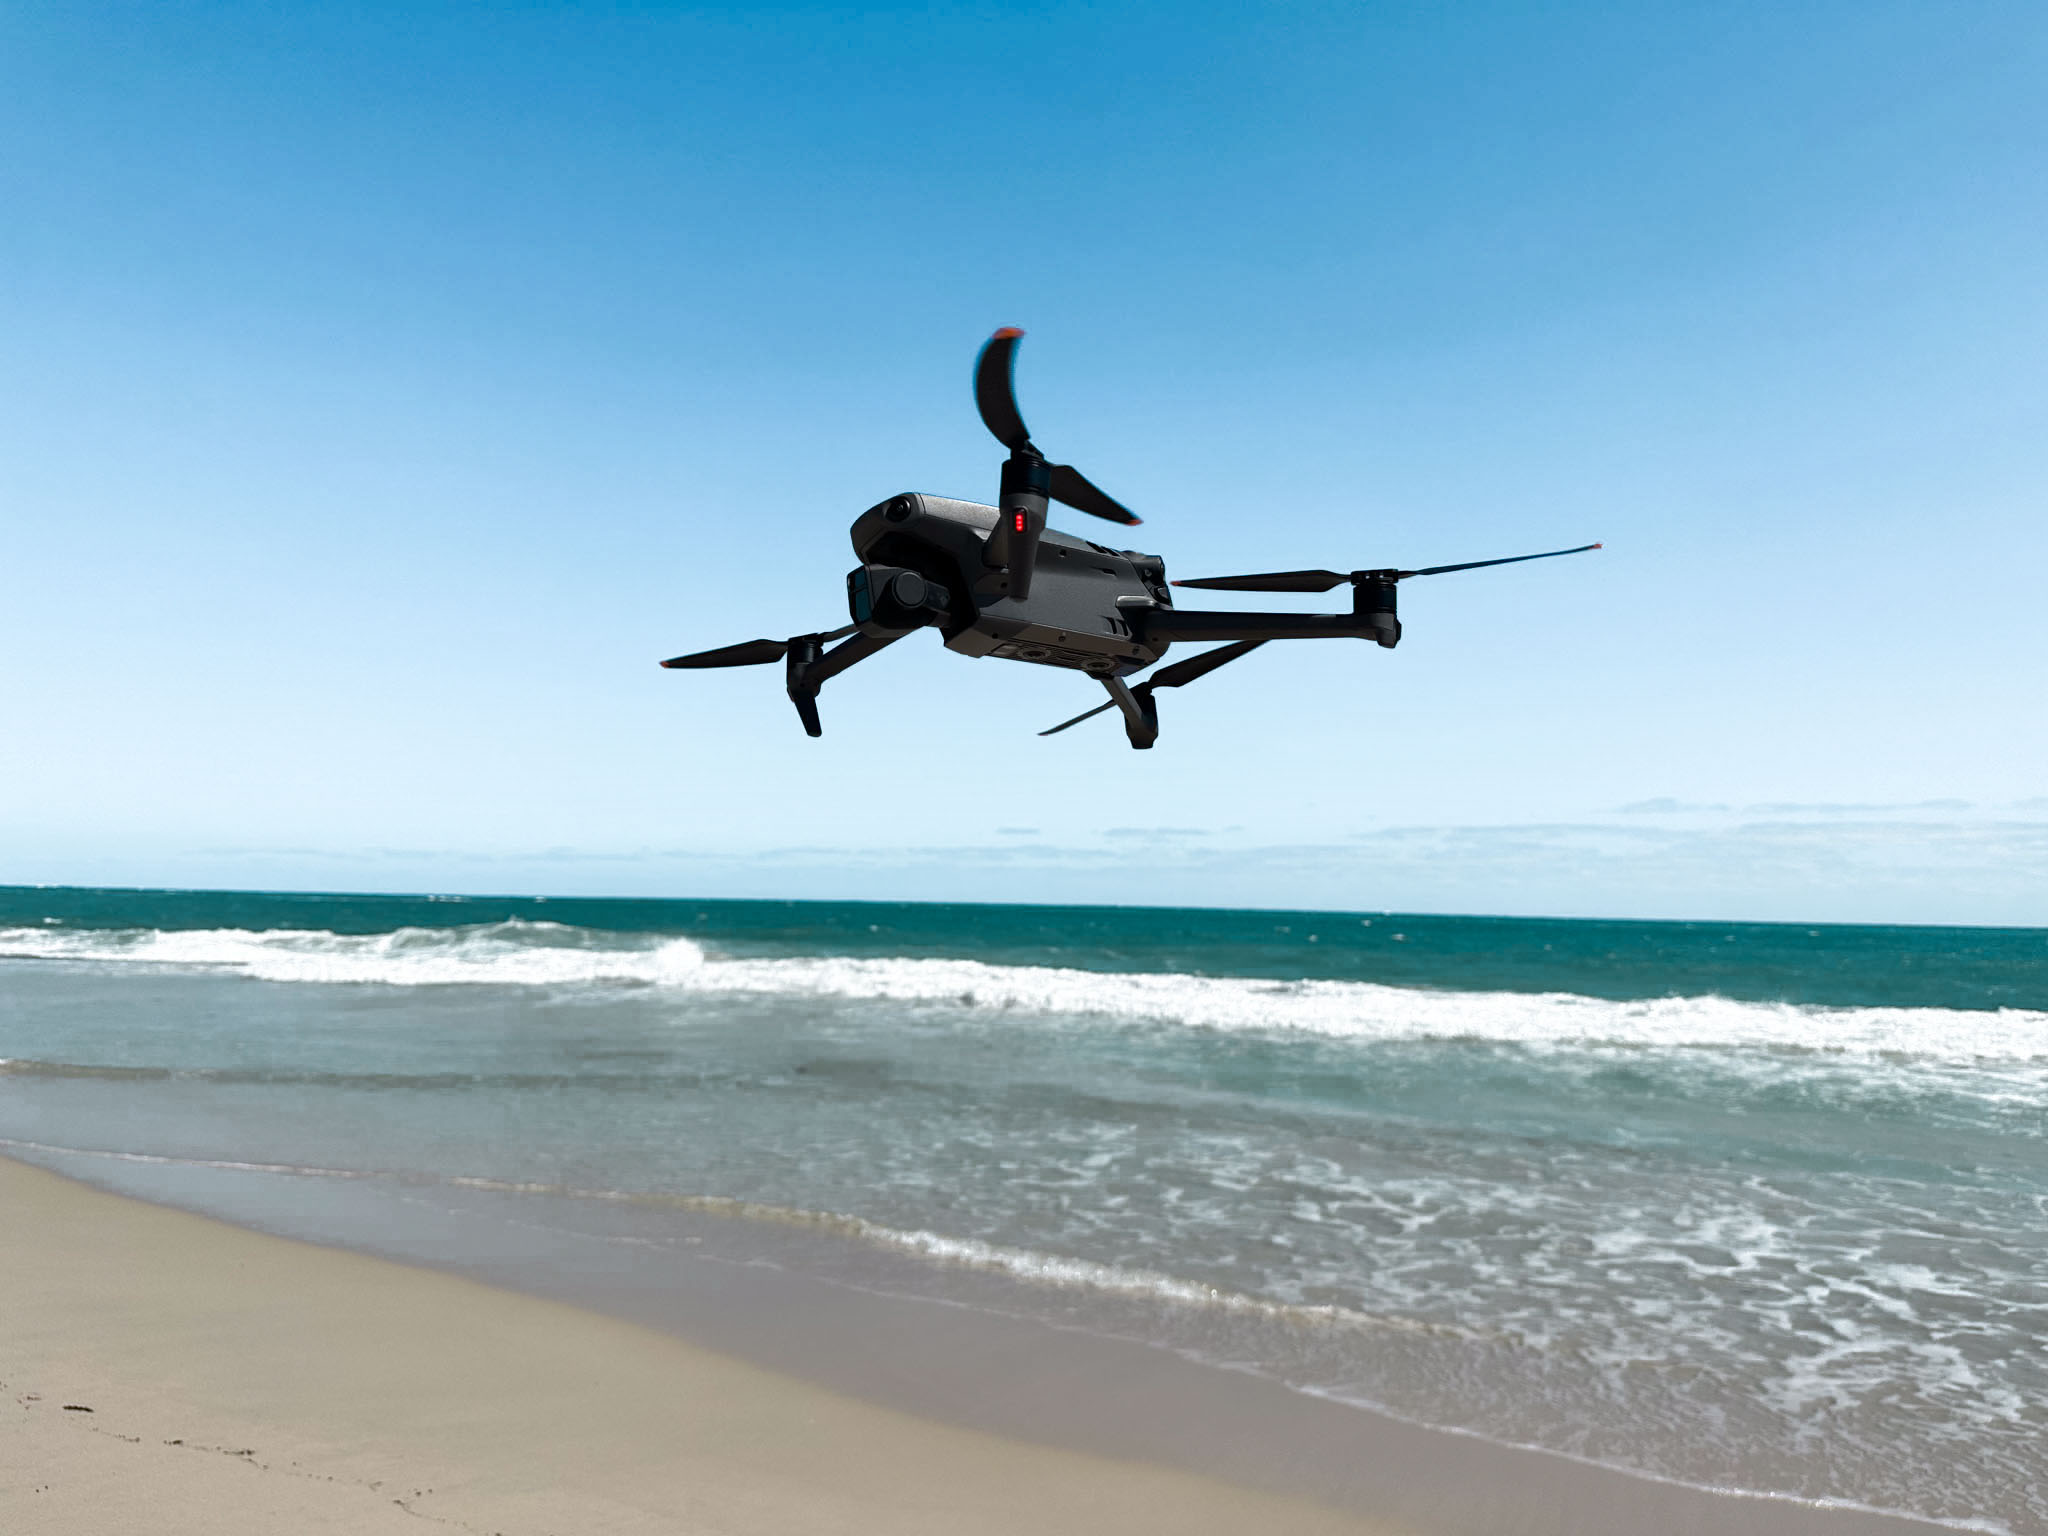
Most modern DJI drones like the Mavic 3 and Mini 4 Pro allow you to shoot in RAW as well as JPEG.
With RAW files capturing more information in both bright spots and shadows thanks to their wide dynamic range, editing aerial shots becomes easier even if the lighting was tricky.
Essential DJI Drone Settings for Photography
1. Shoot in RAW
2. Add grid lines to improve symmetry in your shots
3. Use ND filters according to the time of day(ND16 for a sunny day)
4. Frame rate 24-30 fps for cinematic look,
5. 60 fps for smoother motion
6. Keep ISO low as possible (100-400) to reduce noise
7. Shutter speed is generally twice your frame rate (e.g., 1/60 for 30 fps)
8. Always take off and land in P flight mode
9. Only use sport mode in wide open areas with no obstacles
10. Set return home to high enough to clear obstacles (at least 30m)
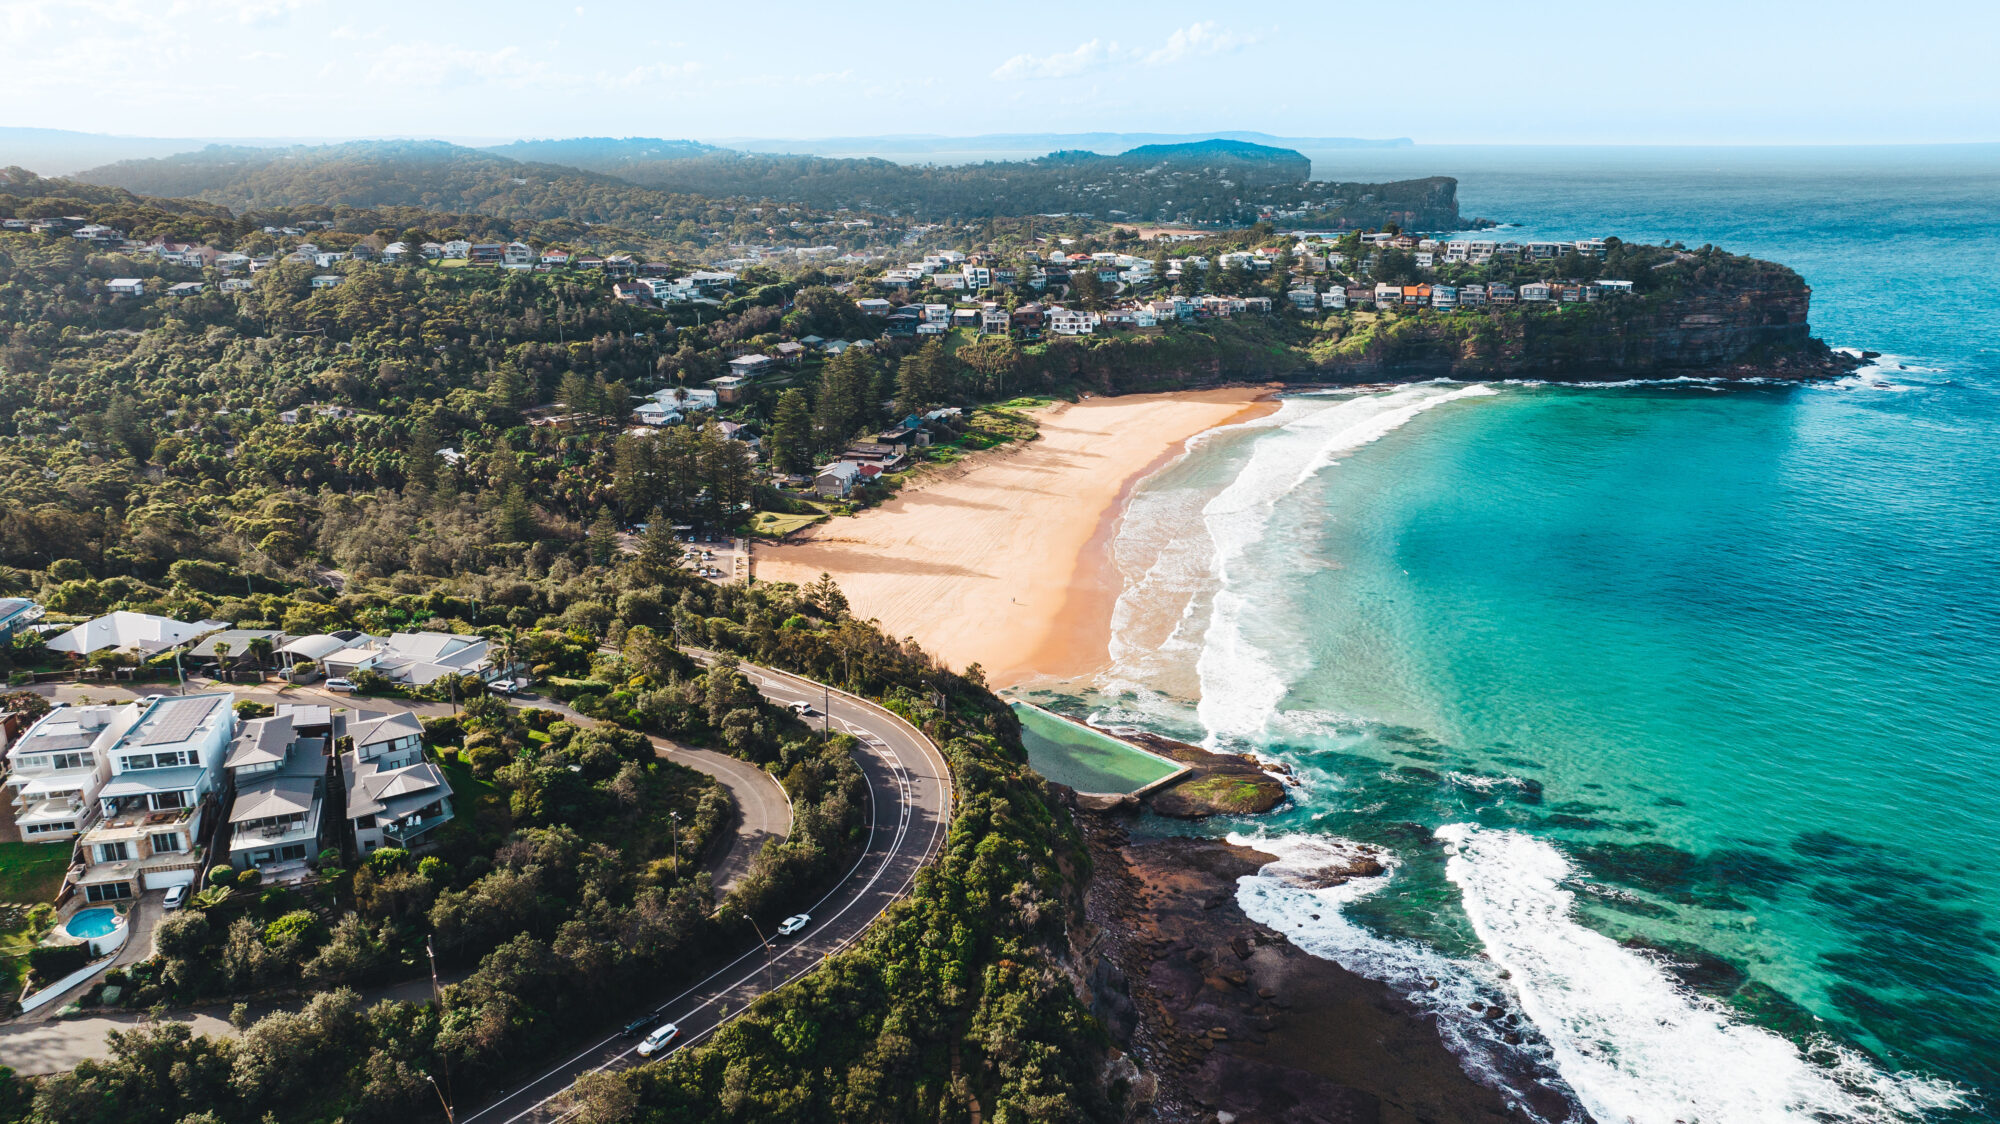
Shooting during the golden hour(sunrise/ sunset) produces long shadows, and intriguing colours in the sky and brings character to your photos. A usual rule of thumb is to face the opposite way of the sun to avoid glare on your drone camera.
Getting Started with Adobe Lightroom for Drone Photos
Adobe Lightroom is available on both mobile and desktop. Adobe creative cloud syncs both together so you can work on the same photos on both devices.
Download and install Adobe Lightroom from the creative cloud. You can sign up to a 30 day free trial of all of Adobe’s software. They have other amazing platforms like Premiere Pro, Photoshop and Adobe Express for graphic design.
- Create an account, make the most of the free trial period and sign in.
- Import your drone images by either dragging and dropping or clicking import
Step by Step: How to Edit Drone Photos in Lightroom
After you’ve imported your drone pictures into Lightroom and got them all sorted, it’s time to really get into the editing part. With Lightroom, you have access to a bunch of tools that can make your drone photos look even better.
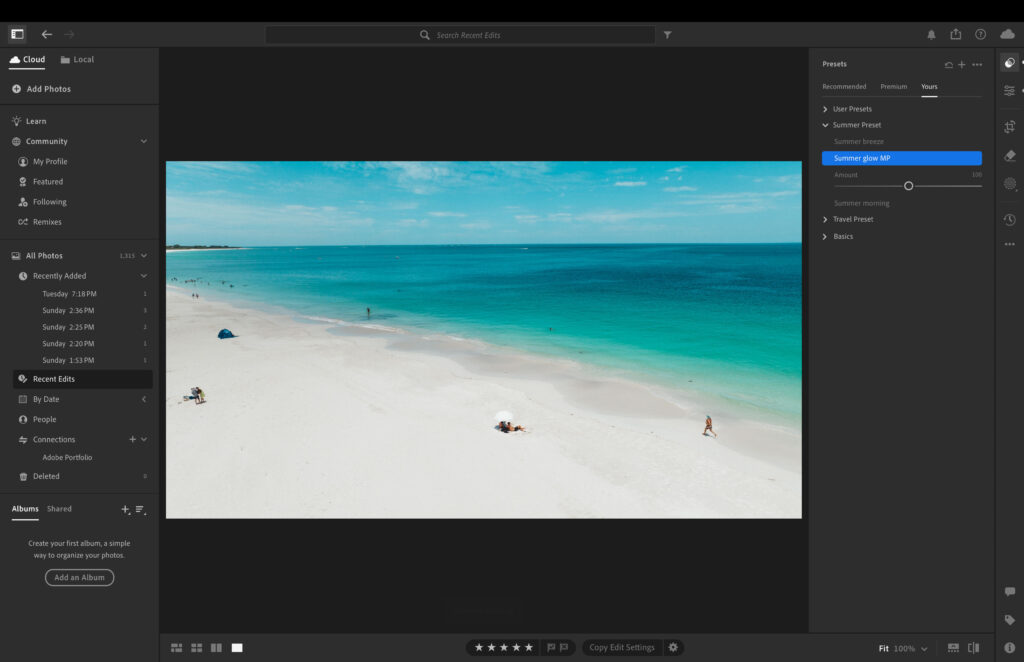
1. Applying Presets
- First step I like to add a preset, I have one that I use on all my pictures. You can use the presets that come with Lightroom or purchase some you like.
2. Set Exposure
- Adjust the Exposure slider to increase brightness or darken the overall image
- Use the Highlights and Shadows sliders to recover detail in bright and dark areas
- Fine-tune with the Whites and Blacks sliders
3. Enhance Contrast and Clarity
- Adjust the Contrast slider to taste
- Use the Clarity slider to add mid-tone contrast (be careful not to overdo it)
- Experiment with the Dehaze slider to cut through atmospheric haze
4. Adjust Colour Mixer HSL Panel
- Adjust the hue of individual colours to your desire (I would usually change one or two colours)
- Adjust the saturation accordingly
- Adjust the luminance of the colour
5. Crop and straighten
- Use the Crop Overlay tool to improve composition
- Straighten horizons using the angle tool within the Crop Overlay
6. Reduce noise and sharpen
- In the Detail panel, adjust Noise Reduction for smoother images
- Use the Sharpening sliders to enhance detail and increase sharpness
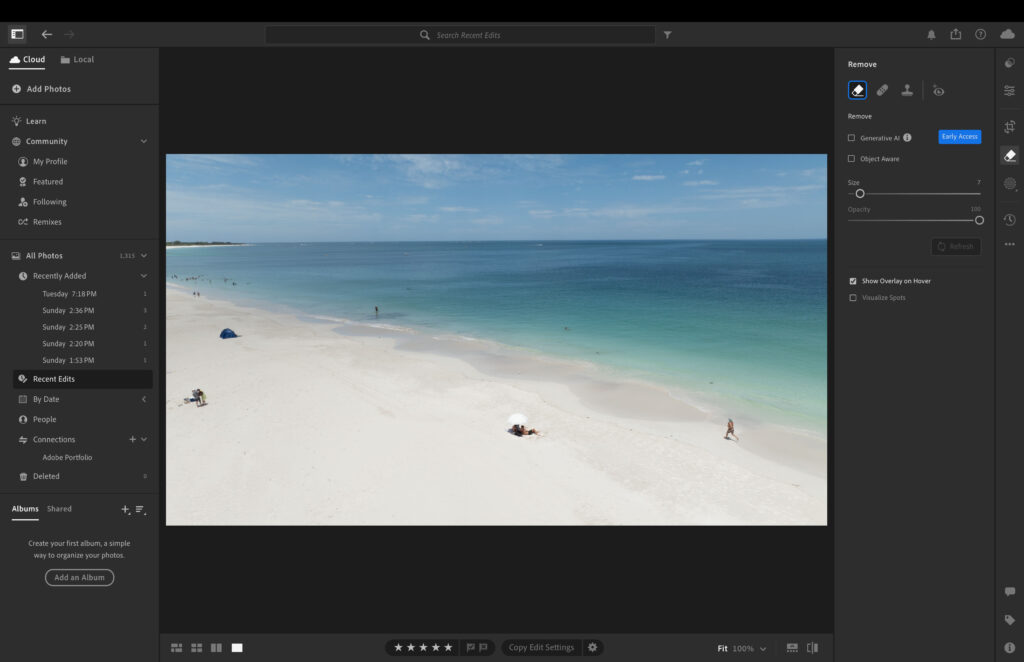
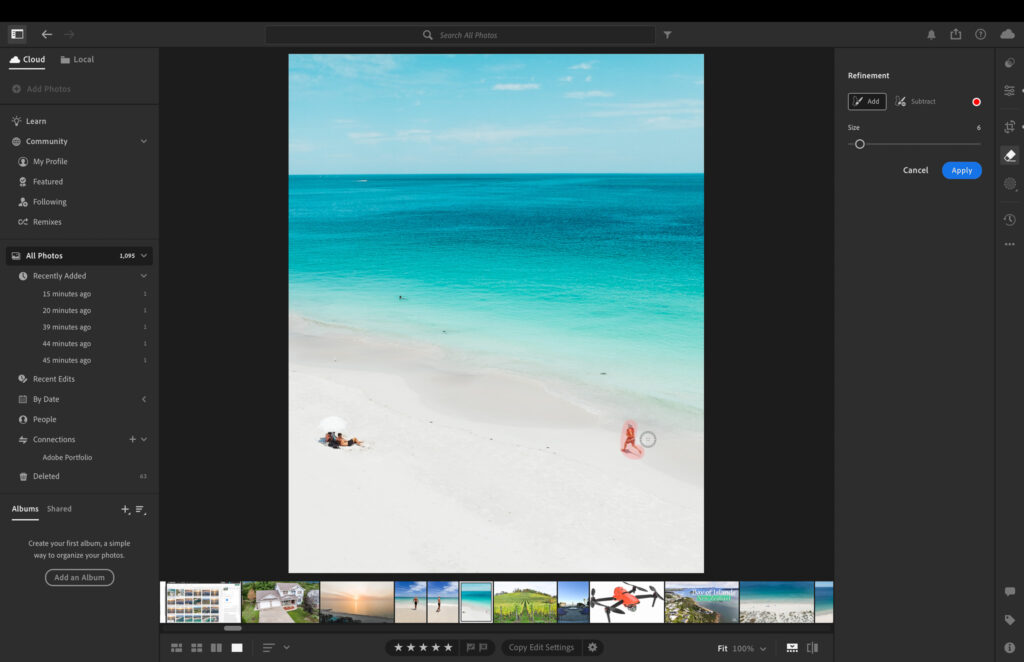
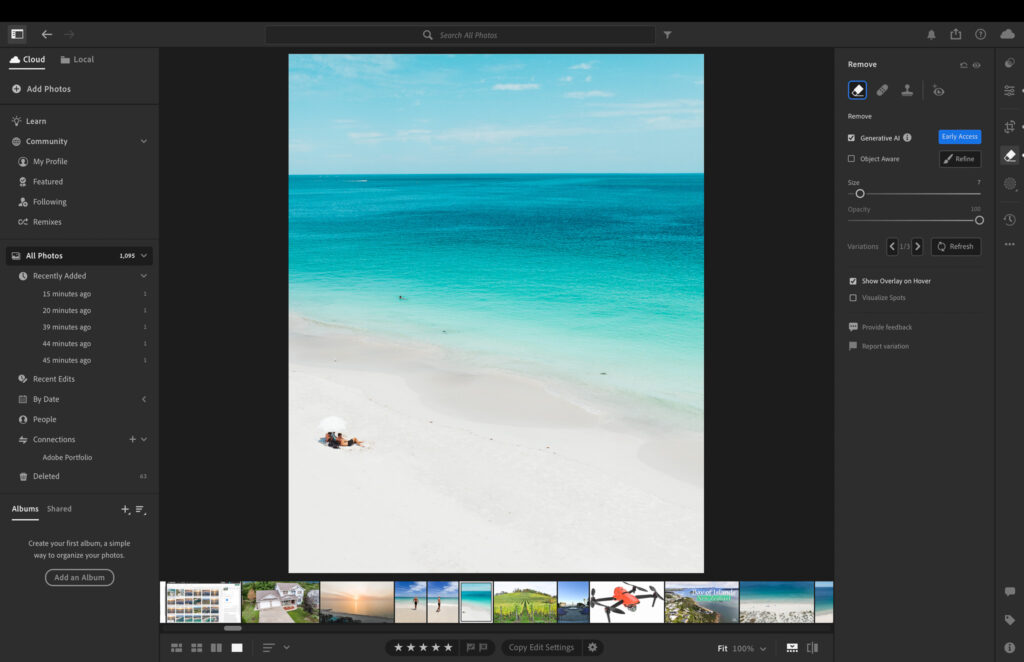
7. How to Remove Unwanted Subjects Using AI in Lightroom
- Click on the AI eraser tool
- Adjust brush size accordingly
- Highlight the area you want to remove
- Click the tick if you are happy with the AI edit
8. Export your edited photos
- Select the aerial photos you want to export
- Click Export at the bottom left
- Choose your desired export settings (file type, size, quality, etc.)
- Select the destination folder and click “Export
Aspect Ratios for Social Media Platforms
- Instagram post 5:4
- Instagram story 16:9
- Tiktok 16:9
- Pinterest pin 2:3
Play around with these tips, it might take a while for you to get the hang of things but with these steps you will be producing professional looking drone photographs in no time.
In Depth: How to Edit Drone Photos in Lightroom
Besides the simple tweaks, Lightroom Classic has cool features to jazz up your drone shots. With presets, you can change how your photos look in just one click because these are settings already fixed for you.
Then there’s split toning, which lets you play with colors in the bright and dark parts of your picture, adding more vibe and appeal. By trying out these creative effects, your drone pictures can really pop and show off a special artistic flair.
Removing Unwanted Objects with the Healing Tool
In drone photography, sometimes you snap a picture and end up with things you didn’t mean to catch in the shot. With Lightroom, there are some really handy tools like the healing tool, clone stamp, and spot removal that make it easy to get rid of those bits.
The healing tool is pretty smart—it looks at your photo and figures out how to mix the colors around so that when it removes something, you can’t even tell it was there.
Using the clone stamp tool lets you pick a part of your picture that’s okay and use it to cover up something not so great. And for tiny problems like dust or little spots on your camera sensor? That’s where the spot removal comes in handy.
Applying Presets to Speed Up Editing Workflow
Using presets in Lightroom is a super simple way to make your drone photos look great and keep them looking the same. With just a couple of clicks, you can add these ready-made settings to your pictures.
These presets are like shortcuts that you can tweak to fit how you want your photos to look. Whether you’re into really bright colors or prefer something less flashy and more subtle, there’s definitely a preset out there for whatever vibe you’re going for.
By using these presets, not only do you cut down on editing time, but also make sure all your drone shots come out looking sharp and professional with that personal style touch.
Creating Panoramas from Drone Shots
What it does is pretty cool – Lightroom takes several pictures you’ve taken and blends them together so you can see the whole wide view of whatever place you’re trying to capture.
To make one of these panoramas, just pick out which photos you want to use, right-click on them, and hit “Merge to Panorama.” Lightroom then works its magic by combining those photos smoothly into one impressive panorama shot.
This trick comes in really handy when trying to get great views of landscapes or cityscapes with your drone where showing how vast an area is matters most.
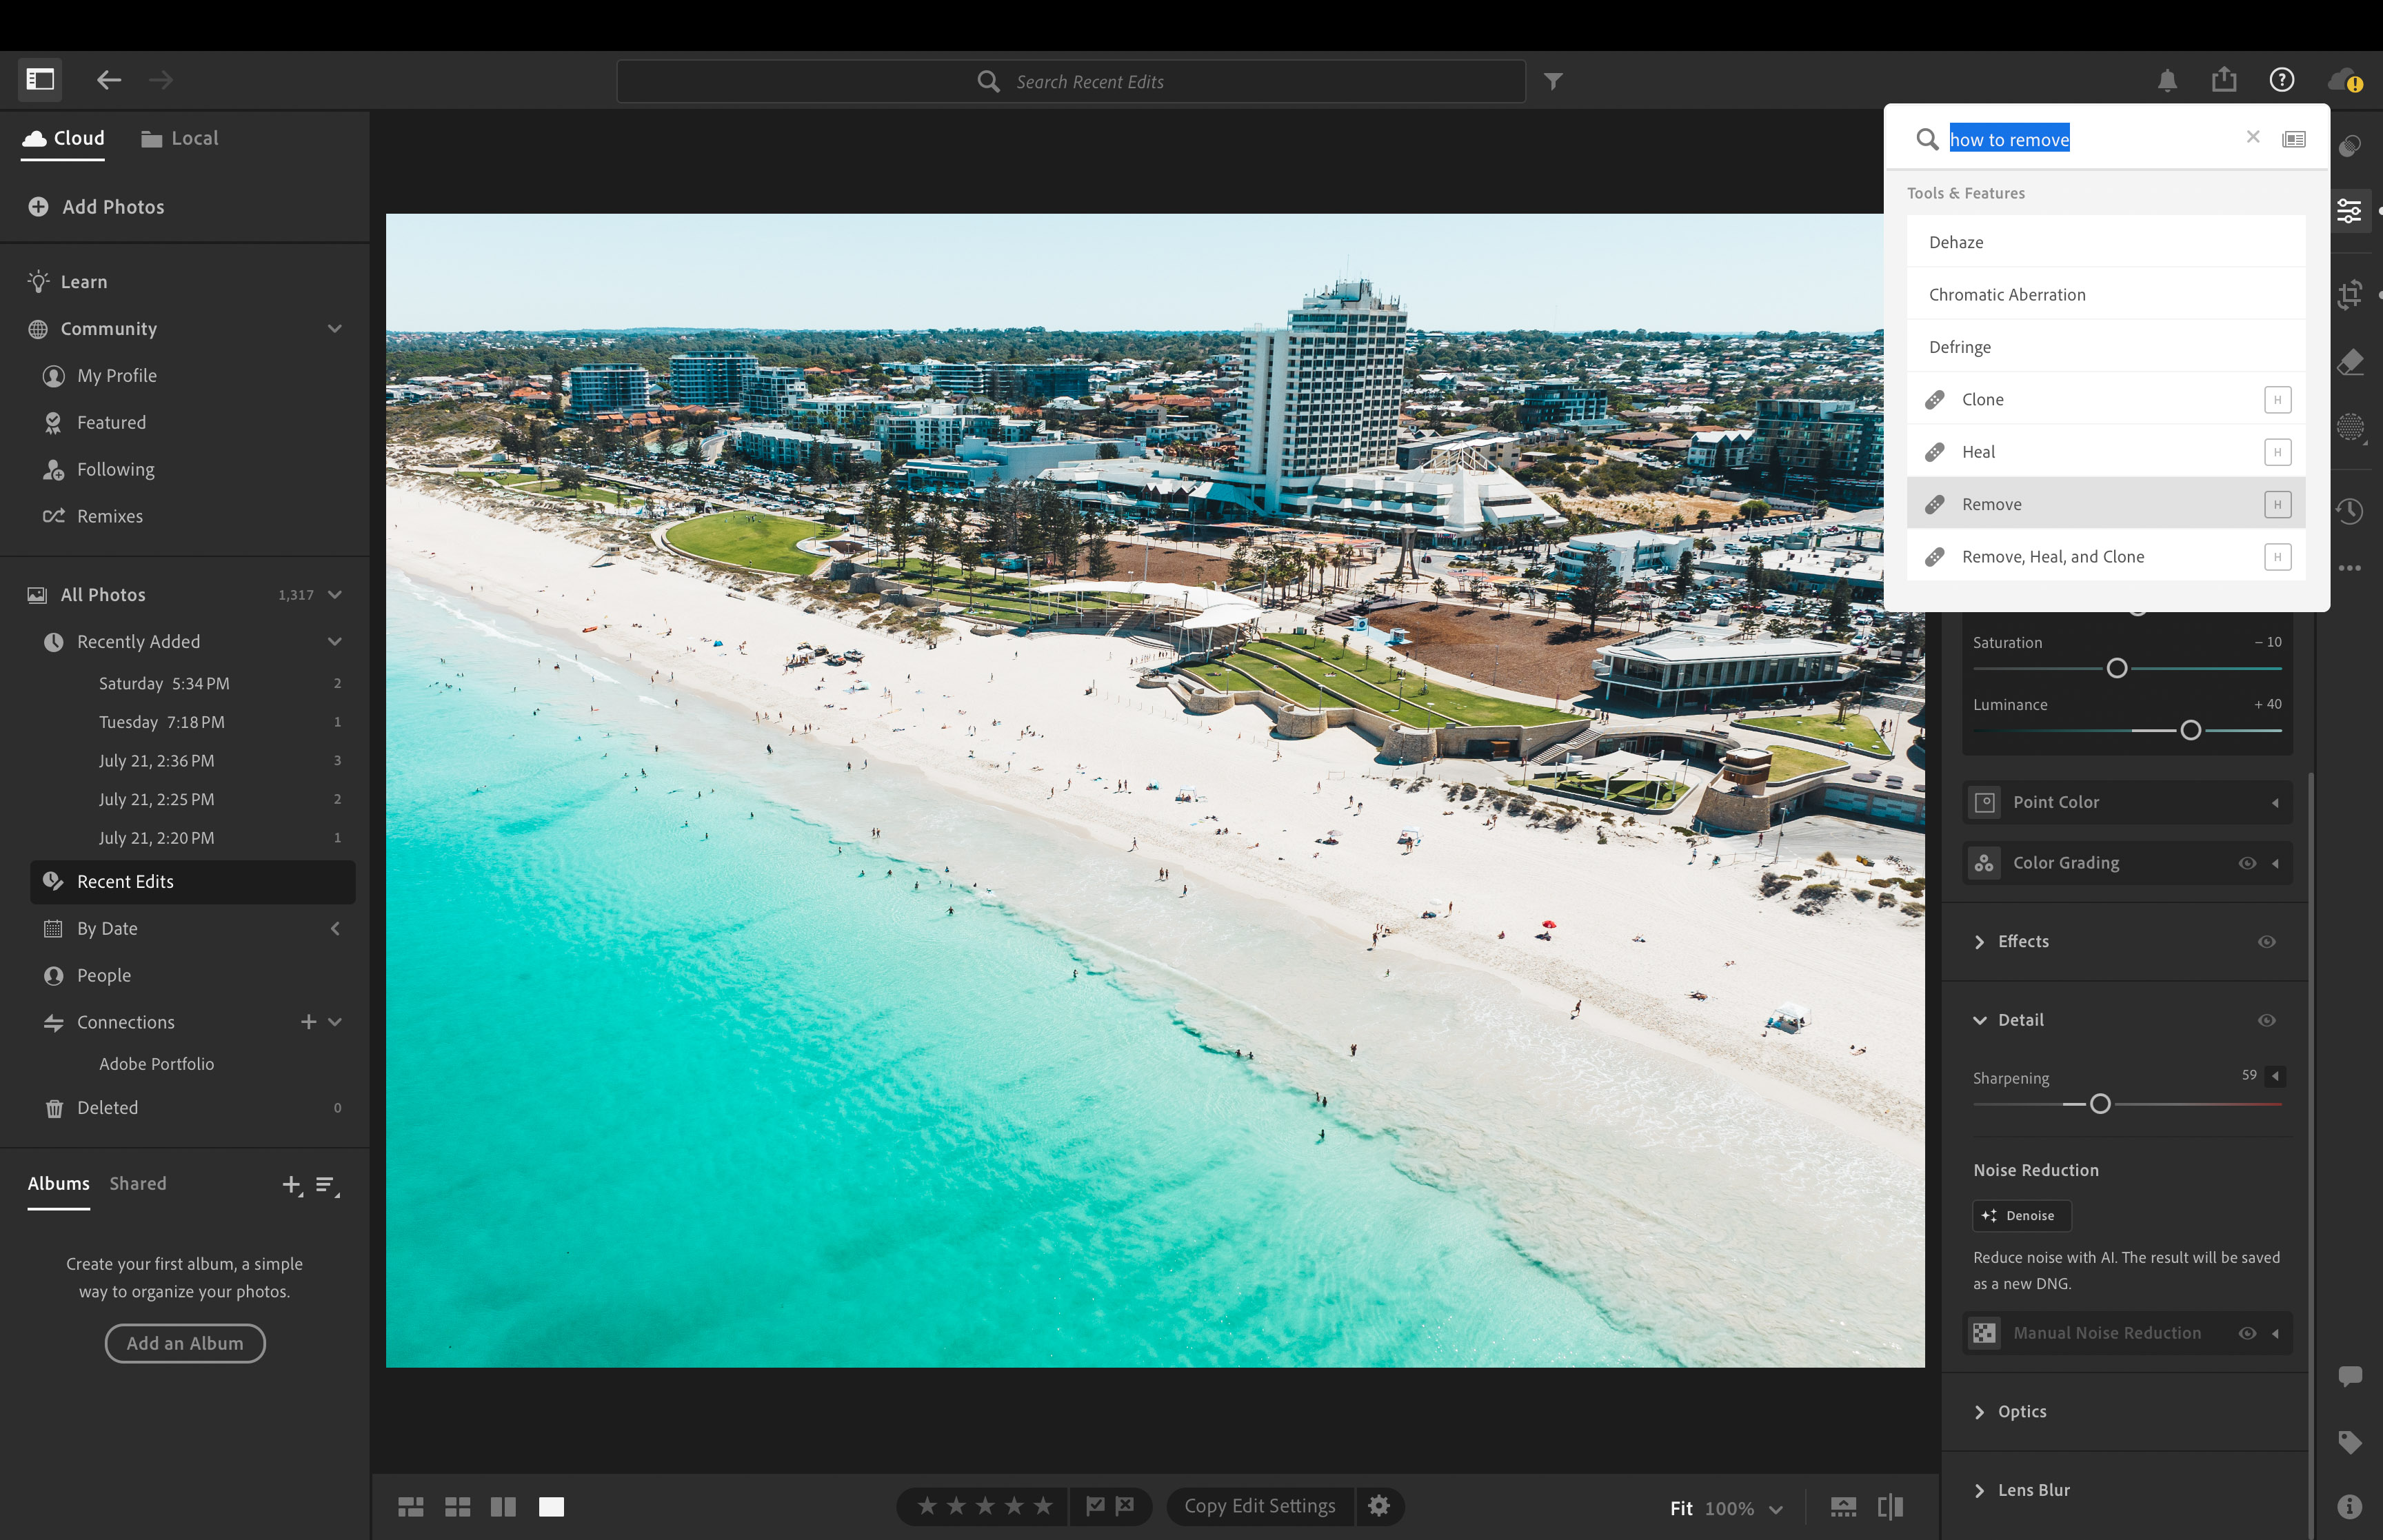
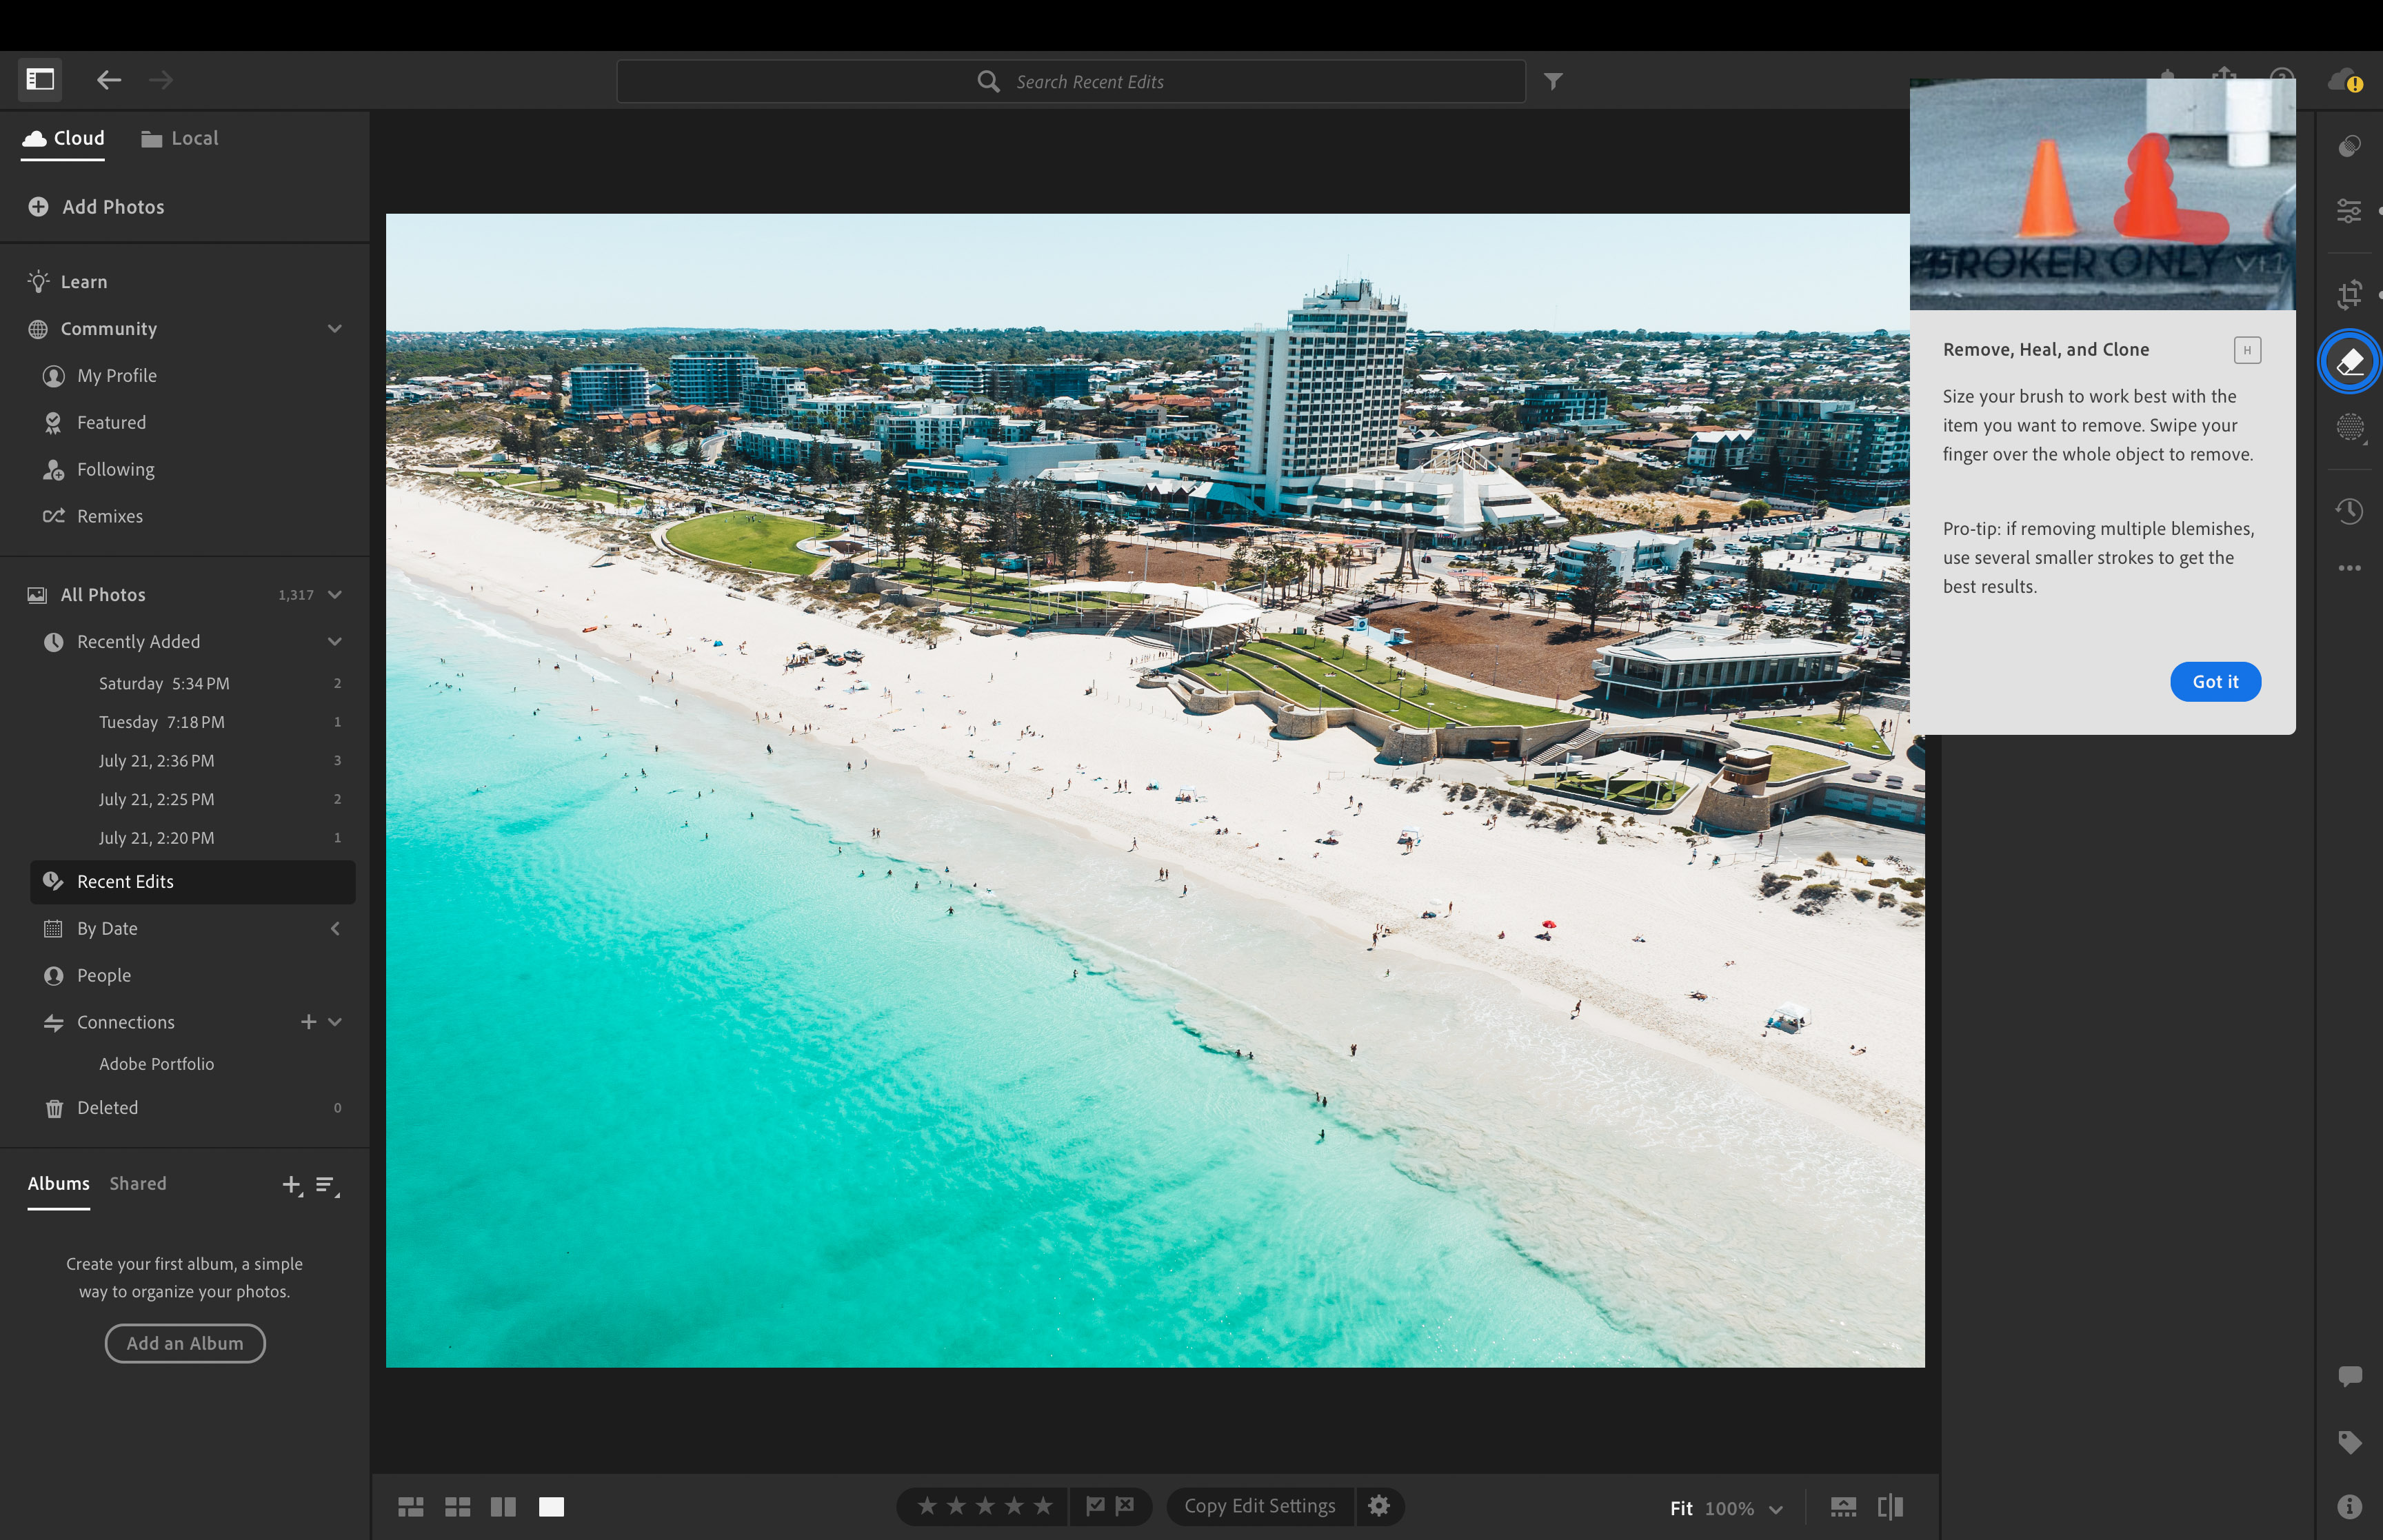
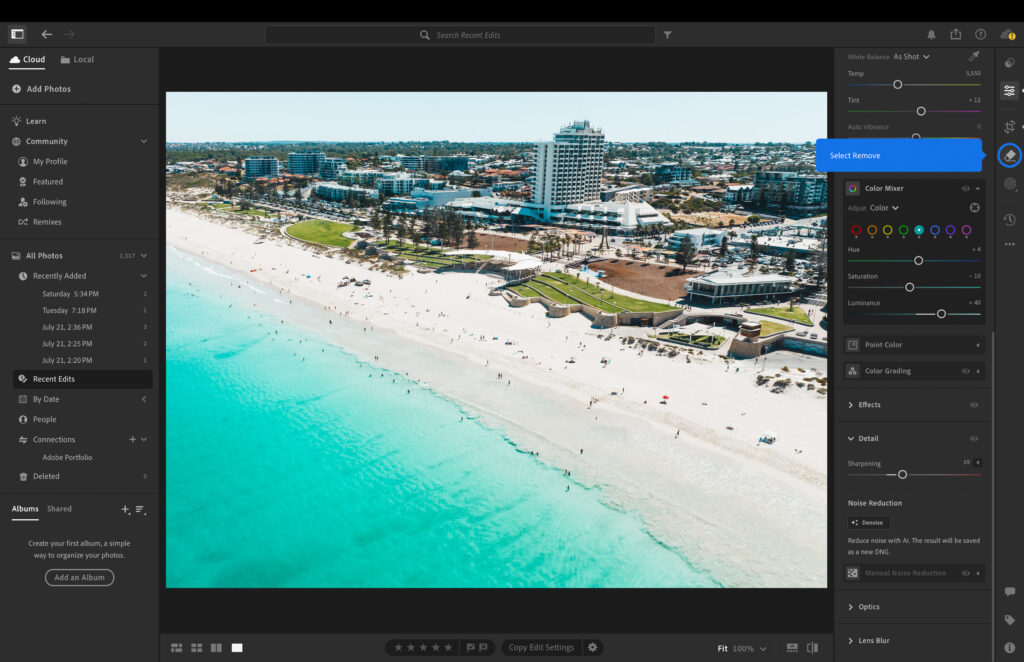
Using the Help Tool to Learn
The help tool/? at the top right of the screen is a great tool for learning. You can type what you want to know and Lightroom will walk you through the steps.
Streamlining Your Workflow in Lightroom
Making your workflow smoother in Lightroom can really help you get more done faster. With Lightroom, there are a bunch of cool tools that make editing easier.
We will dive into some ways on how to edit drone photos in Lightroom with speed.
Batch Editing Techniques
Pick the pictures you want to tweak, fix up one photo just how you like it, and then zap those same changes across all the chosen snaps with the synchronize feature.
It’s not only a huge time-saver but also makes sure all your images look uniform. With batch editing, things like white balance, exposure, contrast – really any part of your picture – can be adjusted all at once.
Keyboard Shortcuts to Speed Up Editing
Getting to know and using keyboard shortcuts in Lightroom can really make your editing workflow faster. With a bunch of shortcuts, Lightroom lets you zip through the program and do lots of things without much clicking around. For instance,
- G brings up the Library module
- D moves you into the Develop module for more detailed edits
- E” opens up Loupe view so you can look at your pictures closely
- F full screen mode
- \ before edits
- / after edits
- R crop tool
Conclusion
Lightroom is your trusty sidekick on the mission to make your drone photos less “meh” and more “wow.” We’ve covered everything from basic tweaks to AI-powered wizardry, giving you the tools to transform those aerial shots from “I flew a drone once” to “I’m basically a professional sky photographer.”
Remember, subtlety is key. Your drone already did the hard work of getting that sweet bird’s-eye view, so don’t go overboard with edits that make your photos look like they were taken on Mars. Unless, of course, you actually flew your drone on Mars – in which case, we have questions.
Refer back to this article on how to edit drone photos in Lightroom the next time you plan on editing. Feel free to tag me on Instagram if you want to show me what you learnt in this article.
Frequently Asked Questions
What’s the Best Software for Graphic Design?
The two graphic design giants are Adobe Express and Canva. Both are amazing tools that offer so much on the free plan as well as a paid plan.
If you use Adobe software you can get an all in one subscription which includes platforms like Lightroom, Premiere Pro, Photoshop, Express plus lots more.
What Are the Best Lightroom Presets for Drone Photography?
When it comes to picking the top Lightroom presets for drone photography, a lot hinges on what you like and the look you’re aiming for.
You’ve got loads of options out there, from ones that make your pictures pop with color to others that give them a more subdued feel.
It’s key to play around with various presets until you find those that really vibe with how you want your photos to look. Among the favorites are landscape, cinematic, and aerial presets designed specifically for drone shots.
How Do I Correct Lens Distortion in Drone Photos?
Fixing the way things look a bit wonky in your drone shots because of the lens can be pretty straightforward if you use Lightroom’s profile corrections feature.
With this tool turned on, Lightroom figures out which lens you used for your drone photos and fixes them up so everything looks right. This comes in really handy when you’re taking pictures of houses or buildings where straight lines are important but end up looking bent or weird because of the wide-angle lens most drones have.
By making these adjustments, your drone photos will show things just like they are in real life, without any odd bends or angles.
Can I Edit 4K Drone Videos in Adobe Lightroom?
Yes it’s possible to edit 4K drone video in Lightroom. With a special section just for video, it’s easy to bring in your drone clips, keep them organised, and tweak them.
You can adjust things like how bright or colourful they are and even use the same presets you’d slap on photos.
If you’re looking to edit drone videos then Premiere Pro would be the go. It’s the go to for videographers creating for platforms like YouTube
